
Though not one of the prettiest of methods of brewing your daily go juice, the Aeropress is often said to produce one of smoothest and cleanest cups of coffee.
A sort of mix between a French press, pour over and drip brewer, this coffee brewing method utilizes a small paper filter to take out those oils, silty elements and bitter elements you may get from a French press, to produce a smooth rich cup of coffee.
What sets this method apart from the French press is thanks to its small size and simple yet solid construction, it is super travel friendly and it’s great for single cup brewing.
So if you are considering taking the plunge and making puck while making a cup, here is our guide on doing exactly that.
What you’ll need:
- AeroPress brewer (That’s a no-brainer, right?)
- Grinder
- Fresh-roasted whole bean coffee (Order online here!)
(or if buying ground coffee, order it ground medium or drip-brew grind level) - Hot water
- A scale or the scoop that comes with the AeroPress
- Timer
- Sturdy mug
GET THE KIT!
Includes brewer, reusable filter AND a 12 oz. bag of Mocha Java blend!
$49.95 for a $65.00 value!
It’s brew time!
Now that you’ve got all materials you need, let’s “take the plunge” and brew us some yummy French press coffee.
A note on the coffee: We recommend buying fresh, locally roasted and whole bean coffee. This way you know the coffee is fresh, giving you the most flavor for your money. Coffee purchased at the local grocery or big box store is often months old, if not more than a year past its roast date. Coffee begins to change its flavor 10 days after roasting. Also, ground coffee begins losing its flavor three days after grinding. So if you order ground coffee, make sure to use it soon, or if you grind your coffee, only grind what you’ll need when you need it.
Okay, enough with the tips. Now on with the brewing.
Step 1: Boil water
Set your water to a boil. You will only need around 7 fluid ounces.
Step 2: Grind your beans
While you are waiting on your water boil, if you have whole coffee beans, take the time to measure out 18 grams. If you use the scoop that comes with the AeroPress kit, and fill it with coffee, it’ll come out pretty close to that, but that of course will very slightly depending on whether you are brewing a light roast or a dark one as light roasts will be heavier and dark roasts lighter.
If in doubt, use that fancy scale to make sure you’ve got 18 grams.
Step 3: Place the filter
Insert the paper filter into the AeroPress’s detachable perforated plastic cap.

Step 4: Ready the Aeropress brewer
Put your AeroPress together, inserting the press with the rubber grommet just inside the larger vessel while making sure there is a good seal. Once done, place the assembly on the scale or table top with the octagon-shaped flange facing up.
Step 5: Add coffee
Add the ground coffee. Feel free to use the funnel that came with your AeroPress to make sure the grounds don’t fall into the grooves in the flange where filter cap will be attached.

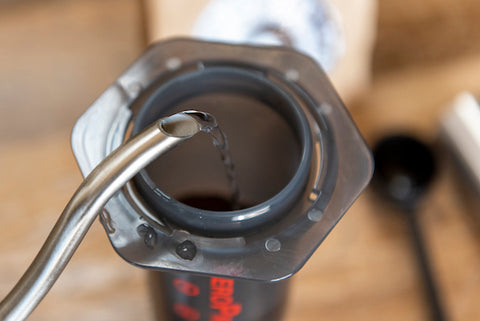
Step 6: Add water
By now your water should be hot. A rule of thumb is to bring the coffee to a boil and then let it rest for one minute. That should bring the water to the proper temperature for brewing — about 200 degrees F. Once you have confirmed the water is ready, start the timer and start pouring your water into the top of the AeroPress over your coffee until you have added around 36 grams of water.
Step 7: Lightly Stir
Lightly stir the mixture with the paddle to cause full saturation and then let it rest 30 seconds. If the mixture foams a bit, that’s a good thing. It means your coffee is fairly fresh and it is degassing.

Step 8: Complete pouring
Fill the AeroPress’s brewing chamber with the rest of the water, and gently stirring once again, being careful not to spill the coffee or water on the flange.

Step 9: Wait for it ...
After a minute, place the perforated cap on the brewing chamber, turning the cap to lock the ears under the tabs.

Then quickly but carefully, flip the assembly over and place on top of your mug, making sure the perforated filter cap is inside the mug and the flange is firmly placed on the mug.

Step 10: Press
Carefully, but steadily press down on the “piston” vessel. If your grind is too fine, you may find this difficult and if too coarse, very easy. A proper grind will give you some resistance, but not too much. Keep pressing until you hear a hissing or gurgling sound as last bit of water is pushed out.

Step 11: Remove assembly and empty
At this point, lift the assembly off the mug.

Once over your compost or trash bin, unscrew the filter cap and push the piston to push the coffee and filter out of the assembly.
Congratulations! You have made your first puck of coffee while making a cup of coffee with your AeroPress.
Enjoy your coffee! You earned it.
About G4C
Grounds 4 Compassion is an Oklahoma City-based company focused on providing freshly roasted quality coffee for our customers and investing back into our community. Our goal is ultimately to help improve our community and our world as we endeavor to make a good cup of coffee.
Click here to learn more about or to shop Grounds 4 Compassion.


